Email Integration Setup Guide: Connect, Manage, & Track

Rajni
Last updated on April 3, 2026
Every missed email costs your business a customer.
But emails pile up quickly. Conversations scatter across inboxes and chat platforms. Your team wastes valuable time searching for context.
YourGPT’s Email Integration organizes these conversations. All customer interactions stay in one place, clear and connected.
In this guide, you’ll learn how to easily set up YourGPT’s Email Integration. You’ll reduce missed messages, simplify your workflow, and consistently deliver better customer support.
Email Integration allows your AI agent to send and receive emails directly within the YourGPT dashboard. This integration centralizes all email interactions, enabling your team to easily track conversations without switching platforms.
The email integration feature of YourGPT ensures that team members and customers quickly receive email notifications with full chat transcripts.
Likewise, if a customer requests human assistance and no operator is currently online, YourGPT immediately alerts your support team by email, including full details of the chat. Operators can quickly continue the conversation from the mobile app or web, eliminating confusion and repetitive interactions.
YourGPT supports custom domain integration, enabling emails to be sent directly from your business’s own address. You can easily set up email forwarding (allowing you to view emails from Gmail, Outlook, GoDaddy, or Namecheap within your YourGPT dashboard), simplifying communication management.
Email Integration seamlessly connects chat conversations and emails, keeping customers and your team fully updated.
The benefits include:
Every message stays centralized, ensuring efficient support and smooth interactions across all channels.
Before you get started, there are a few things you’ll need to have in place. Think of it as setting the table before serving a great meal.
Email Integration requires a Professional plan or higher. Upgrade if necessary.
To send emails from your business domain (e.g., [email protected]), access to DNS settings is needed. Usually available through domain registrars like Atom , GoDaddy, Namecheap, or Cloudflare.
Your chatbot must be actively running within a YourGPT workspace. Integration relies on this setup.
Sometimes, the AI agent might not have the answer. Using AI Studio, you can clearly define the next steps in such situations. Options include forwarding the message, tagging a specific team member, or sending a notification to your inbox. Planning these responses in advance ensures customers always receive timely assistance.
Once you’ve checked off these steps, you’re ready to turn on email integration and offer customers support that’s fast, smart, and easy to trust.
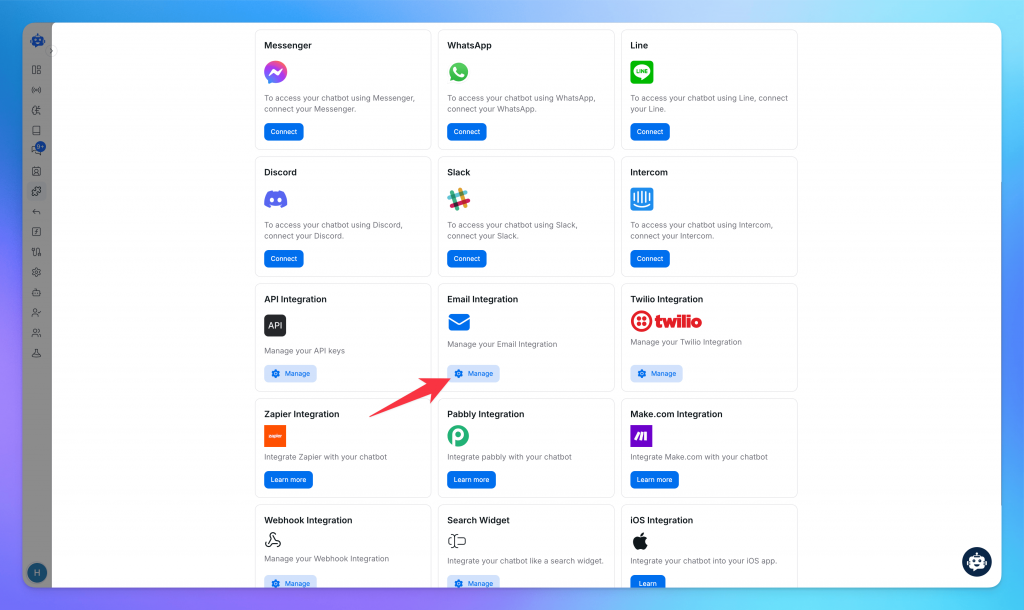
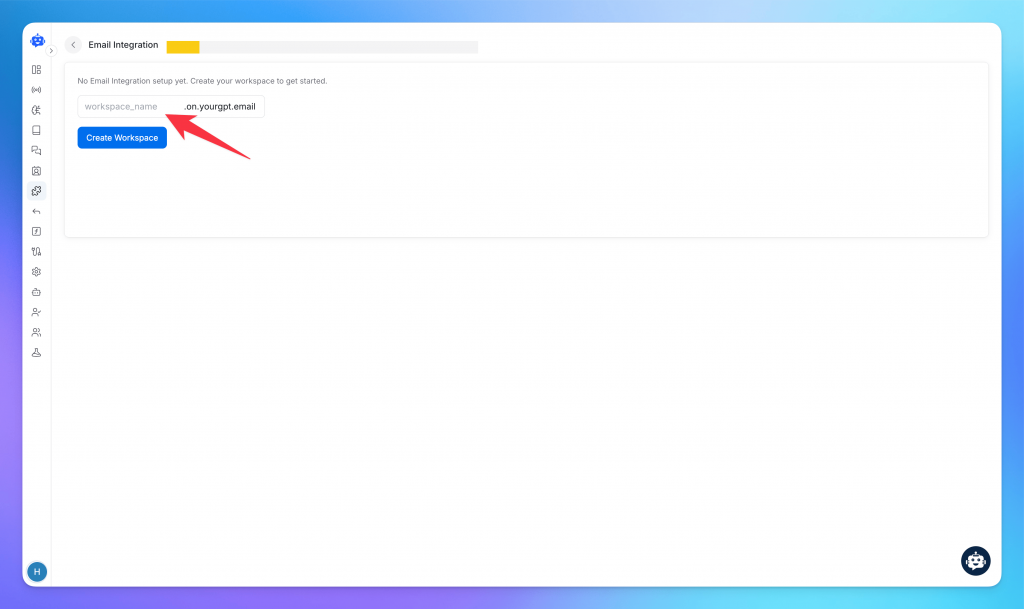
Here’s how to enable email integration in YourGPT in a few straightforward steps:
Optional configuration for better control like custom domain, email forwarding.
If you want emails to appear from your brand’s own address, such as [email protected]? Here’s how you set this up:
1. Add Your Domain in Settings
Access the email settings and select “Add Custom Domain.” Enter your chosen domain, for example: email.yourcompany.com or support.yourcompany.com.
2. Configure DNS Records
You’ll receive a set of DNS records that need to be added with your domain provider (such as Cloudflare or GoDaddy).
3. Verify the Records
Once your DNS entries are live (this can take up to 24 hours), use the dashboard’s verifier to check if everything is in place and accepted.
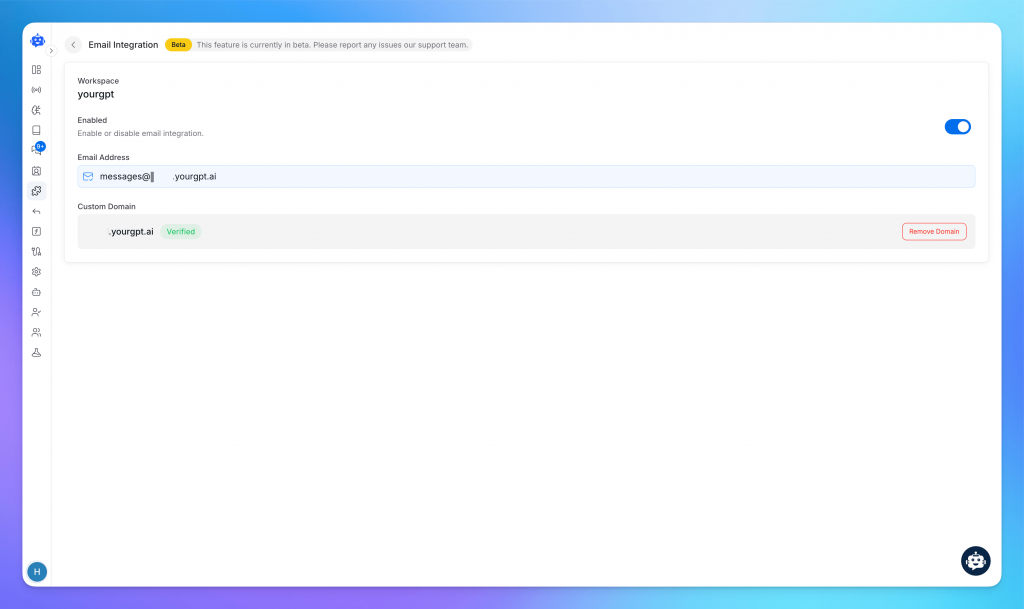
4. Activate the Domain
After verification, your AI agent will use your custom address for both sending and receiving. This keeps your messaging branded and professional, with delivery handled directly through YourGPT.
Gmail users can now bring YourGPT’s AI capabilities straight into their daily inbox routine. The official YourGPT Chrome & Firefox extension is live and ready on the Chrome Web Store, designed for direct use with Gmail and other major email providers.
What will you be able to do?
Quick setup process:
This feature is now part of Gmail and helps you manage email more efficiently. It’s simple to use and doesn’t require any extra steps.
Email continues to be a trusted channel for customers, even as chatbots take on a bigger role in daily support. When the two are connected, communication becomes easier to manage and far more reliable. Instead of scattered threads and repeated conversations, every message is part of one clear timeline that your team can track and respond to quickly.
With an integrated system, routine requests can be handled by AI while complex issues are passed to the right person with all the necessary context. This balance helps your team focus on meaningful work, reduces errors, and gives customers a smoother experience every time they reach out.
The next step is consistency. Review conversations regularly, strengthen your email setup, and make sure handoffs are clear. When customers see timely replies and thoughtful follow-ups, support feels more personal and dependable, even when AI is doing much of the heavy lifting.
Give your team one place to handle chats and emails together. Stay organised, reply on time, and keep every customer conversation connected.
Quick setup • 7 day free trial

TL;DR The Shift: Support bots used to answer questions. In 2026, AI agents resolve them by reading live order and carrier data, then taking direct action. They can issue refunds, update addresses, and close WISMO tickets without human involvement. The Stakes: WISMO and refund requests already account for a large share of a typical support […]
TL;DR A customer experience strategy is a documented plan for how people, process, and technology work together across every customer touchpoint, not just a support-team initiative. Strong CX optimization can drive 5 to 10 percent revenue growth and reduce costs by 15 to 25 percent within two to three years, making it an executive-level priority. […]
SaaS companies usually do not hit support overload because the product is failing. They hit it because the product is working. More users mean more onboarding questions, more billing confusion, more integration issues, more feature requests, more account-access problems, and more tickets arriving outside business hours. A small support team that could manage 500 customers […]
TL;DR OpenAI shipped workspace agents inside ChatGPT Business and Enterprise in April 2026, giving the product the ability to plan multi-step work and act inside connected tools. The update narrows the gap between ChatGPT and dedicated AI agents for internal work, but it does not replace customer-facing support platforms. Workspace agents live in the ChatGPT […]
AI has become part of how modern SaaS products operate in everyday use. It appears in small but meaningful moments, such as when a support request is resolved without delay, when onboarding adapts to how a user actually works, or when routine account changes happen without manual intervention. These experiences shape how teams and customers […]
Customer conversations have become one of the most important parts of the customer experience, but they are also one of the hardest to scale. Businesses today are expected to provide instant responses across websites, messaging apps, social media, and support channels without significantly increasing support costs or team size. This shift has made Chatbot as […]