How to Add an AI Chatbot to Your WordPress Website 2026

Rajni
Last updated on July 30, 2026
Setting up an AI chatbot on WordPress takes only a few minutes and requires no coding.
The chatbot can be customized for your website and connected with WooCommerce to answer product, order, and customer questions.
It also supports multilingual responses and multi-channel automation across websites and messaging apps.
WordPress runs your website, but how do you help visitors when you’re not online? Many leave without answers, and missed conversations often mean missed opportunities.
Studies show that 90% of customers expect quick replies, and most define “immediate” as within ten minutes. Traditional contact forms, static FAQs, and delayed email replies often struggle to meet that expectation.
That is where AI chatbots can help. A well-trained chatbot can welcome visitors, answer common questions, recommend products or services, collect leads, and guide users toward the next step, even when your team is offline.
In this blog, you will learn how to add an AI chatbot to your WordPress website, customise it to match your brand, and train it using your own business data so it delivers helpful, accurate responses to your visitors.
Before you begin setting up your AI chatbot on WordPress, make sure you have a few basic things ready. The setup process is simple and beginner-friendly, so you do not need any coding skills or developer support.
To get started, you will need:
You can also prepare a few extra resources to make your chatbot more accurate and useful:
Once these are ready, you can complete the setup directly from your WordPress dashboard. The chatbot can be installed, customised, and launched through a visual interface, with no coding or complex configuration required.
Your chatbot setup begins with choosing the right AI chatbot platform. The platform you select will determine how easy it is to install the chatbot, how well it works with your WordPress website, and how effectively it can support your business as you grow.
A good chatbot platform should be simple to use, powerful enough to handle real customer queries, and flexible enough to adapt to your business needs. When comparing AI chatbot platforms for WordPress, look for these key features:
Choosing the right platform at the beginning makes the rest of the setup much easier. It also ensures your chatbot can do more than answer basic questions it can capture leads, support customers, and guide visitors toward meaningful actions.
YourGPT is built for people who want powerful AI automation without dealing with technical complexity.
It combines simplicity, flexibility, and enterprise-grade reliability in one platform.
Here’s what makes it different:
You’ll spend about 2–3 minutes creating your account and accessing the dashboard before moving to the next step.
Adding YourGPT to your WordPress site takes just a couple of minutes. The official plugin manages the entire setup automatically, you do not need to manually configure.
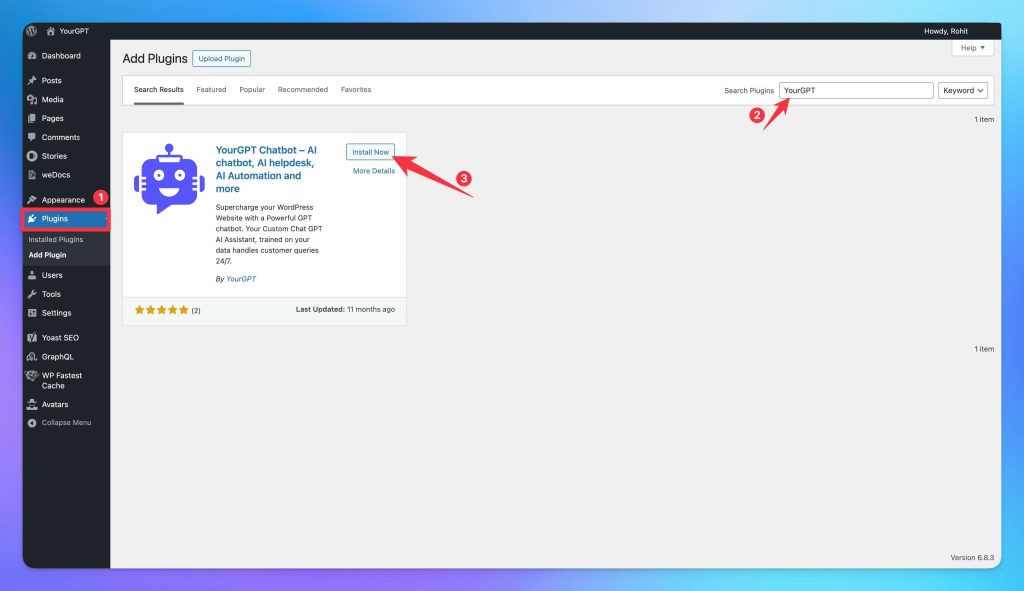
yoursite.com/wp-admin)Once activated, you’ll see a new “YourGPT” option in your WordPress admin menu. This is your control center for managing the chatbot directly from WordPress. The plugin is lightweight and optimized, adding less than 50KB to your page load time, so your site performance remains unaffected.
Before you connect the chatbot to WordPress, you’ll need a YourGPT account. This takes just a few minutes and gives you instant access to all features.
Once you finish, your dashboard will open automatically and you can create your first agent.
Here’s where your chatbot truly takes shape the smart assistant that speaks in your brand’s voice and helps customers around the clock.
To get started, open the YourGPT dashboard and Click Create New AI Agent.
Give your agent a clear, memorable name. It could match your brand or sound friendly and approachable. If you’re unsure, use the built-in name generator to get a few ideas.
Next, choose the AI model that fits your use case best:
Now, define your chatbot’s tone and purpose. For example:
“You are a helpful support assistant for [Your Business Name]. You guide visitors, answer product questions, and help them make decisions.”
Set how you want it to sound professional, friendly, or casual and decide whether it should use emojis or keep responses formal.
You can always refine these settings later as you see how visitors interact with it. The goal is to make it feel natural, helpful, and aligned with your business personality.
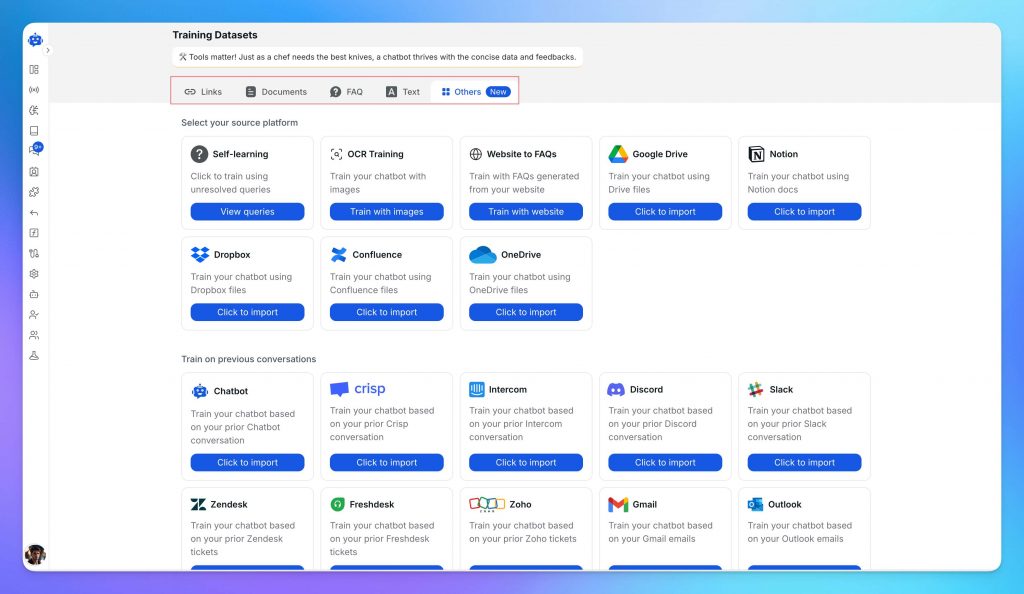
This is where your chatbot starts learning about your business what you sell, how you communicate, and the questions your customers ask most often. The more relevant data you provide, the smarter and more accurate it becomes.
In your YourGPT dashboard, go to Training → Add Data Source → Website.
Enter your WordPress URL, and YourGPT will automatically scan your site to collect and index important content like web pages, blogs, and docs FAQs. The training process depend on your size of the training data usually takes 2–5 minutes.
You can make your chatbot even more capable by adding additional data sources:
Start with essential information pricing, product details, policies, and troubleshooting guides, Training with the FAQs is the Best way. As your chatbot interacts with users, you can add more content over time to improve accuracy.
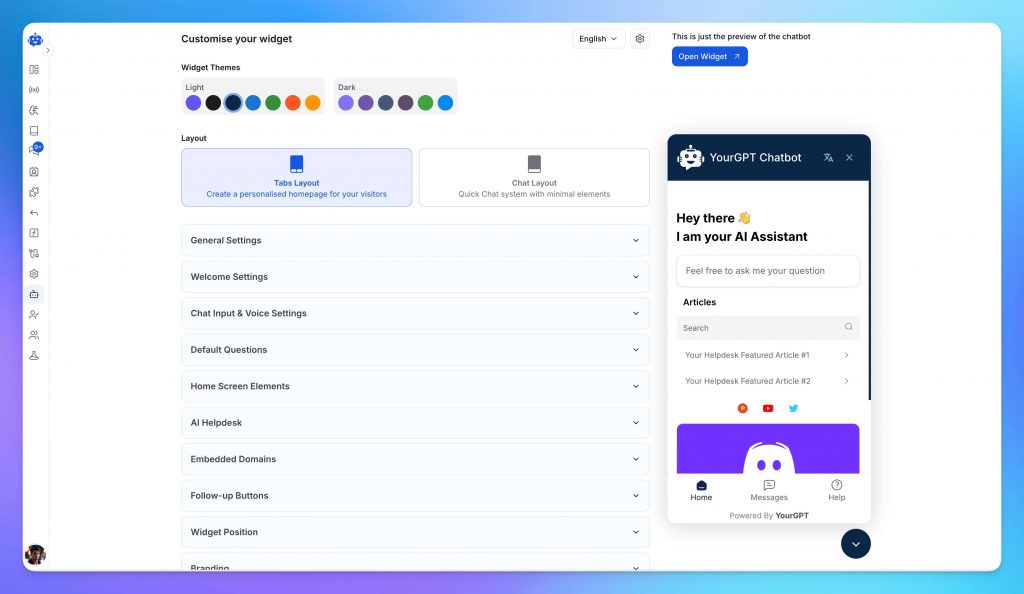
Your chatbot should look and feel like a natural part of your website. With YourGPT, you can easily make it match your brand’s style in just a few clicks.
Open the Appearance panel in your YourGPT dashboard. Here, you can choose where the chat widget appears, add custom branding, adjust its size, and pick a layout that fits your site design.
Add your brand colours, upload your logo, and write a short, welcoming tagline something simple like “How can we help you today?”
Make It Engaging
Before publishing, use the preview option to test everything. Make sure it feels natural, fits your site design, and reflects your brand personality.
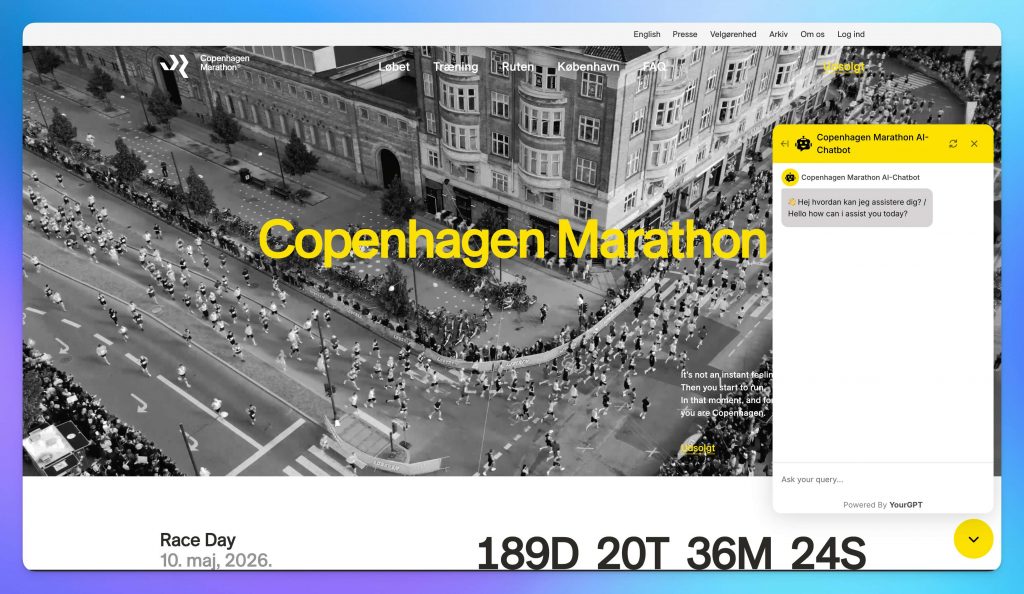
Connecting YourGPT to your WordPress site takes less than a minute.
That’s it — your chatbot is now live on your website.
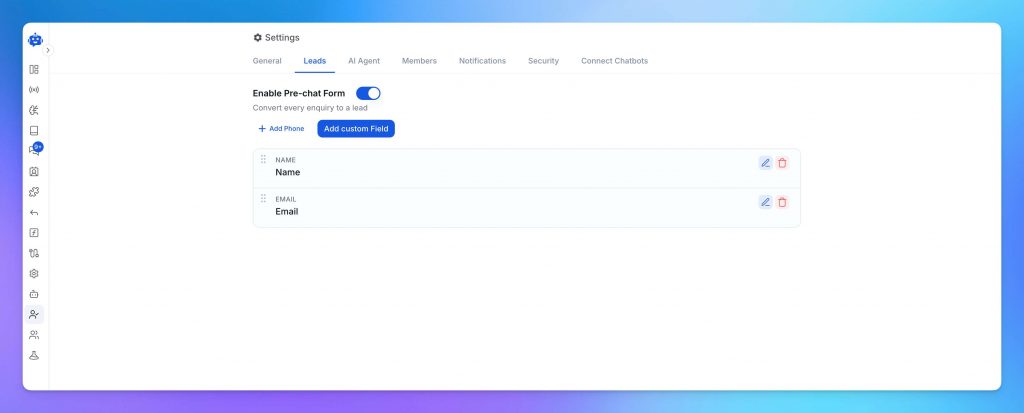
Turning on lead generation takes just a few clicks.
That’s all you need to start capturing leads directly through your chatbot.
If you want a more advanced setup, use AI Studio to design a complete lead journey from greeting users to syncing their details directly with your CRM or email tools.
If you run an online store, you can extend YourGPT to integrate directly with your WooCommerce setup.
This connection allows your chatbot to provide real-time product recommendations, show price and stock updates, and even assist with order tracking and cart recovery all within chat.
Once connected, your AI can guide customers through product choices, answer availability questions, and offer tailored suggestions based on visitor intent.
It’s an effortless way to turn your WordPress chatbot into a 24/7 sales assistant that helps increase conversions while keeping customers informed.

Your chatbot is live on WordPress. Now you can extend it beyond your website. With YourGPT, the same AI agent can be deployed across multiple platforms so customers can reach you wherever they prefer to chat.
You can connect it to WhatsApp, Instagram, Messenger, Telegram, Slack, Discord, email, or voice all from the same dashboard. Every conversation stays synced, so your chatbot responds consistently across all channels.
It’s a simple way to provide 24/7 support and engagement across your customer’s favorite platforms without managing separate bots.
Most setups run smoothly, but if something doesn’t work as expected, here’s how to fix common problems quickly.
If the widget isn’t visible, first check if the YourGPT plugin is activated in your WordPress admin. Then verify that your Widget ID is added correctly under YourGPT → Settings and clear your browser cache. Common causes include:
If the chatbot provides inaccurate answers, use the debugging view to inspect how it reached that response. This helps you trace the exact source of information and identify what needs adjustment.
In most cases, inaccurate replies mean the chatbot needs more or updated training data. Add missing FAQs, product details, or policy information. Review your AI instructions for clarity, and check that your knowledge base doesn’t contain outdated or conflicting content. Also, using advanced models such as Claude 4.5 Sonnet or GPT-5 can significantly improve accuracy, context understanding, and response quality.
A slow chatbot usually points to site performance issues. Compress custom images (under 100KB), reduce unnecessary plugins, and check your hosting plan. Using a caching plugin can also improve speed.
If products don’t appear in chatbot responses, go to Integrations → WooCommerce in your dashboard. Check the connection status, trigger a manual sync, and wait a few minutes. Ensure your products are published, visible, and not excluded by filters.
If you’re still stuck, help is available through multiple channels:
Pro Tip: Before contacting support, take screenshots of the issue, note any error messages, and mention what you’ve already tried this helps the team resolve your problem faste
Your chatbot is live and working. Now you can make it even better with advanced tools inside YourGPT.
AI Studio lets you create custom chat journeys without coding. Build appointment booking flows, lead qualification steps, or personalised product recommendations using a simple drag-and-drop interface. Add logic, connect external APIs, and deploy instantly.
YourGPT improves automatically as it interacts with more visitors. It recognises common questions, adapts its tone, and continuously strengthens response quality without manual retraining.
Track real-time metrics such as total conversations, resolution rate, customer satisfaction, and lead conversions. Use these insights to refine your chatbot’s responses and update your knowledge base for better accuracy.
Add voice capabilities to handle phone calls, send reminders, or share order updates. Go to Integrations → Phone and connect your business number to start using voice-based support.
No. Adding an AI chatbot is a no-code process. With the official YourGPT WordPress plugin, you only need to paste your Widget ID into the plugin settings. No HTML, CSS, or PHP knowledge is required.
The YourGPT widget loads asynchronously, so it does not block the main thread of your website. With a footprint of less than 50KB, it is designed to keep your Largest Contentful Paint and other performance scores optimized.
You can train the chatbot using website URLs, PDFs, and document files. YourGPT can crawl your WordPress pages, blog posts, and FAQs to build a custom knowledge base for accurate, business-specific answers.
YourGPT offers a 7-day free trial. Paid plans start at $59 per month for the Starter tier, while the Professional plan with advanced automation and AI Studio workflows is available at $79 per month.
Yes. YourGPT is compatible with Elementor, Divi, Beaver Builder, and Gutenberg. Because the chatbot is configured through a global plugin setting, it can appear consistently across pages created with different builders.
Yes. The chatbot includes automatic language detection and supports over 100 languages. It can identify a visitor’s language and respond using information from your trained business data.
Yes. You can configure human handoff rules for complex questions or direct requests for a person. Your team can be notified through email, Slack, or the YourGPT dashboard and take over the live conversation.
YourGPT is SOC 2 Type 2 certified and GDPR compliant. Data is protected with AES-256 encryption, and zero-day retention policies with LLM providers help prevent business data from being used to train public models.
You have built more than just a chatbot. With YourGPT, you have created an AI agent that works around the clock to support visitors, answer questions, perform real-time actions, capture leads, and help drive more sales. Tasks that once required constant manual effort can now run automatically in the background.
To get the best results, keep improving your chatbot over time. Review conversations, update your knowledge base, refine responses, and make small adjustments each week. The more accurate and helpful your content is, the better your AI chatbot will perform.
Adding an AI chatbot to your WordPress website is only the beginning. As your business grows, your chatbot can grow with it, helping you deliver faster support, better customer experiences, and more meaningful conversions.
Engage visitors instantly with AI chat that captures leads and boosts sales. Seamlessly integrates with WordPress and WooCommerce. No coding needed.
7-day free trial · No credit card required
Tier 1 support handles first contact. See how Tiers 0 to 3 differ and what changes when an AI agent becomes your first line.
The 12 customer service metrics to track when an AI agent resolves tickets, with a formula for each and a baseline built from your own last month.

Calculate cost per ticket with one formula and a free calculator, then compare it with the cost of a conversation an AI agent resolves.
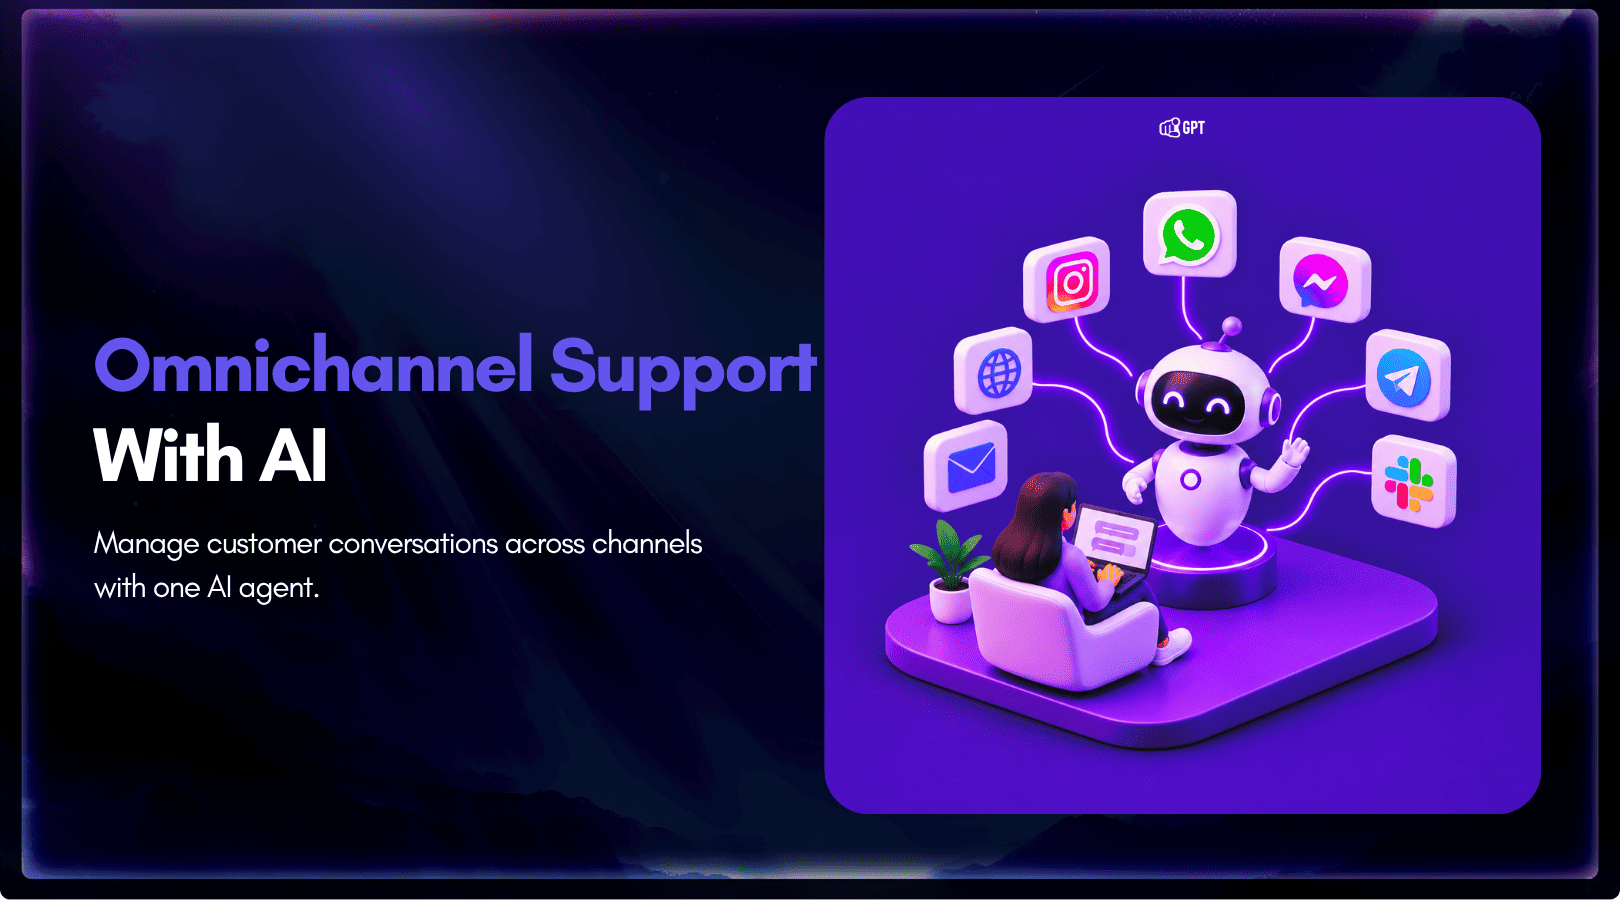
Omnichannel support means every channel answers from the same knowledge. Train one AI agent, pick your first channel, and test that answers match.
Self-learning AI agents log the questions they miss. Learn how human review turns those gaps into trained answers and how to run the weekly loop.
Train an AI agent on your return policy, connect the Shopify template in AI Studio to check real orders, and route exceptions to your team.